
This post may contain affiliate links. Please read our disclosure policy.
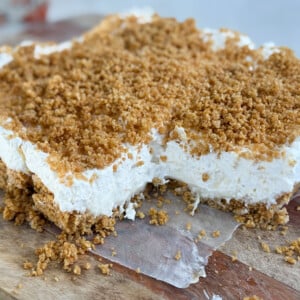
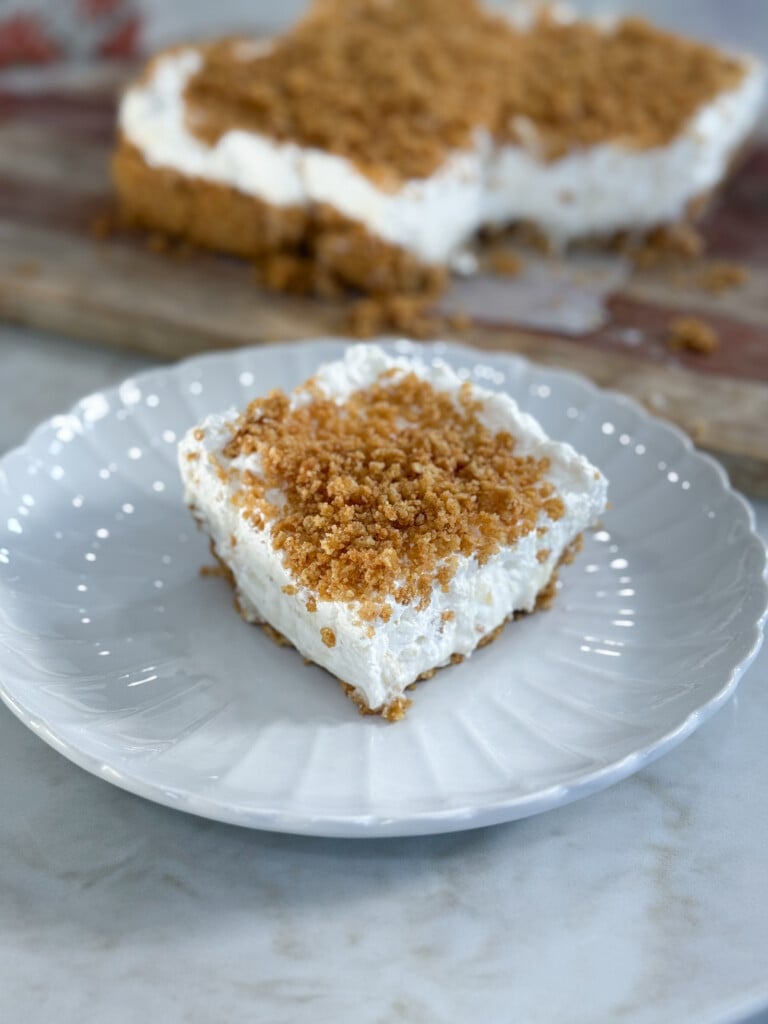
No-Bake Pineapple Layered Dessert is the best dessert recipe to make this summer with all of its fresh and creamy flavors and textures.
With the fact that there is no baking needed to create this luscious dessert recipe, you can whip this delicious holiday treat up without having to break a sweat.
The combination of the cream cheese, buttery graham cracker crumbs, and fresh pineapple flavor, your taste buds will be just as eager as mine are when I am done preparing this dish.

Why you’ll love this family favorite recipe!
I love that I can create a simple no-bake dessert recipe with only a handful of ingredients, and you won’t even know it wasn’t hard to make. The flavors are out of this world, and the crunchy texture of the crust and topping mixed with the creamy center layers makes for an amazing pairing.
Table of Contents
Ingredients for No-Bake Pineapple Layered Dessert:
Graham Cracker Crust:
- Crackers: I like to use the honey graham crackers for the crust of this no bake dessert
- Butter: Use unsalted butter that has been melted
Cream Cheese Filling:
- Cheese: Softened cream cheese will be the base of this creamy layer
- Butter: Carefully soften the butter rather than melting it completely to help everything combine well
- Sugar: I use powdered sugar in this layer to help create stiff peaks in the creamy cheese mixture
Cool Whip Topping:
- Pieapple: I like to make this super simple by using a can of crushed pineapple that has been drained well
- Topping: Use Cool Whip topping that is thawed for easy mixing
How to make No Bake Pineapple Layered Dessert:
Create the Crust:
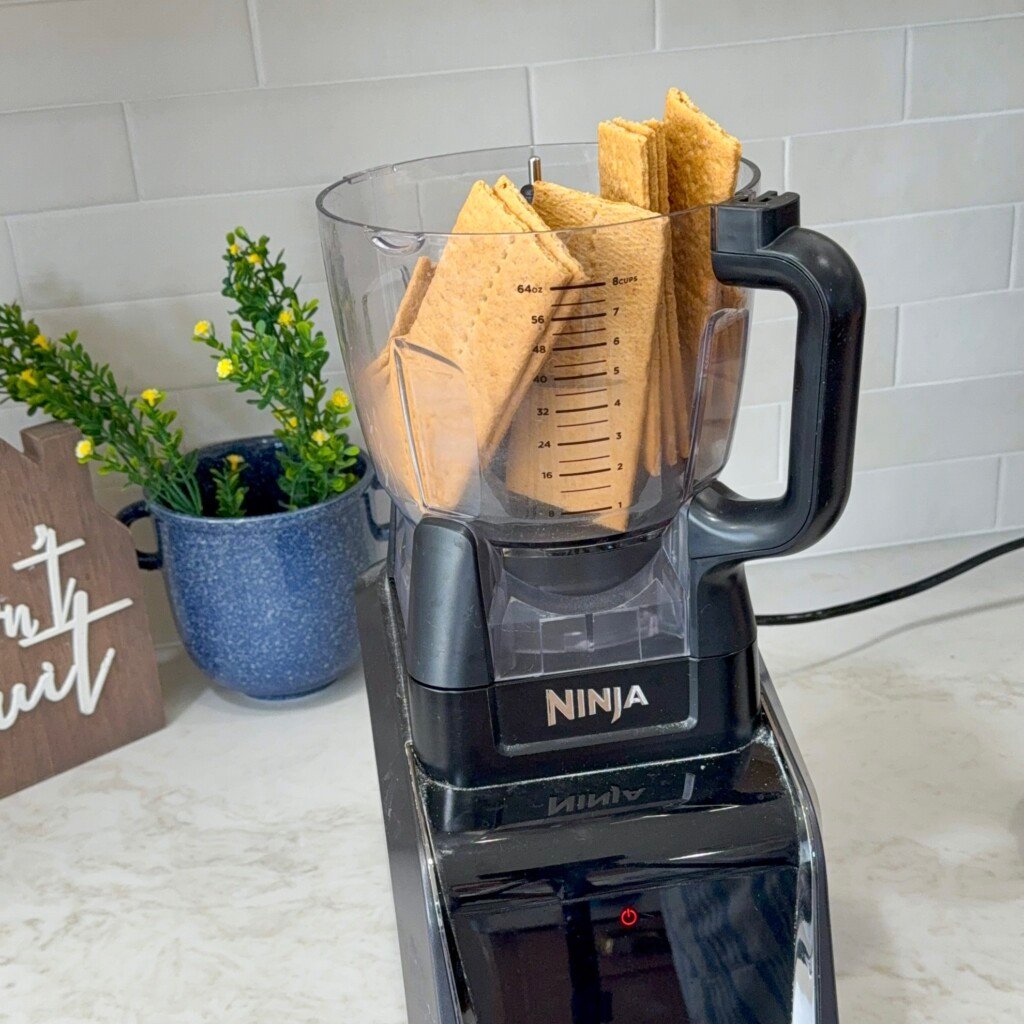

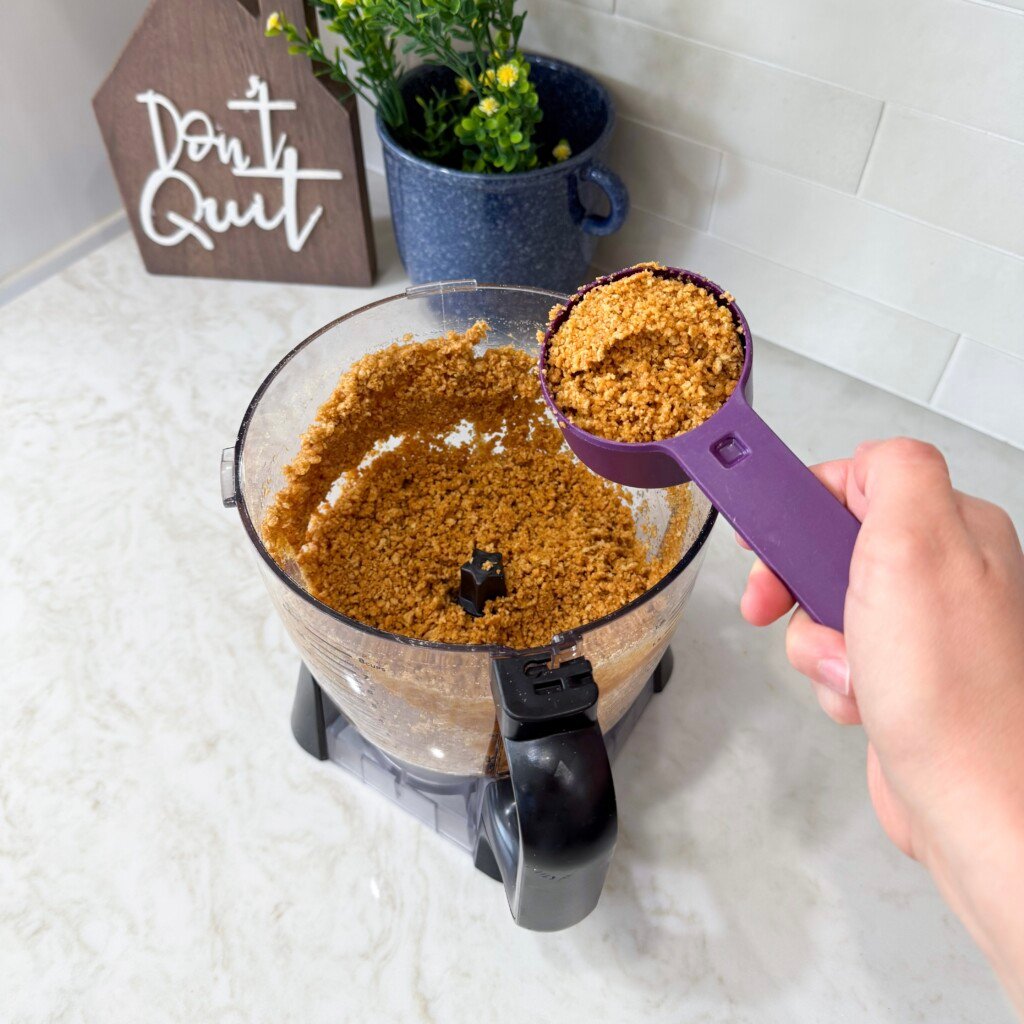
- Place the graham crackers into a large ziplock bag and crush then with a rolling pin to crush the graham crackers (or you can place the graham crackers into a food processor to crush).
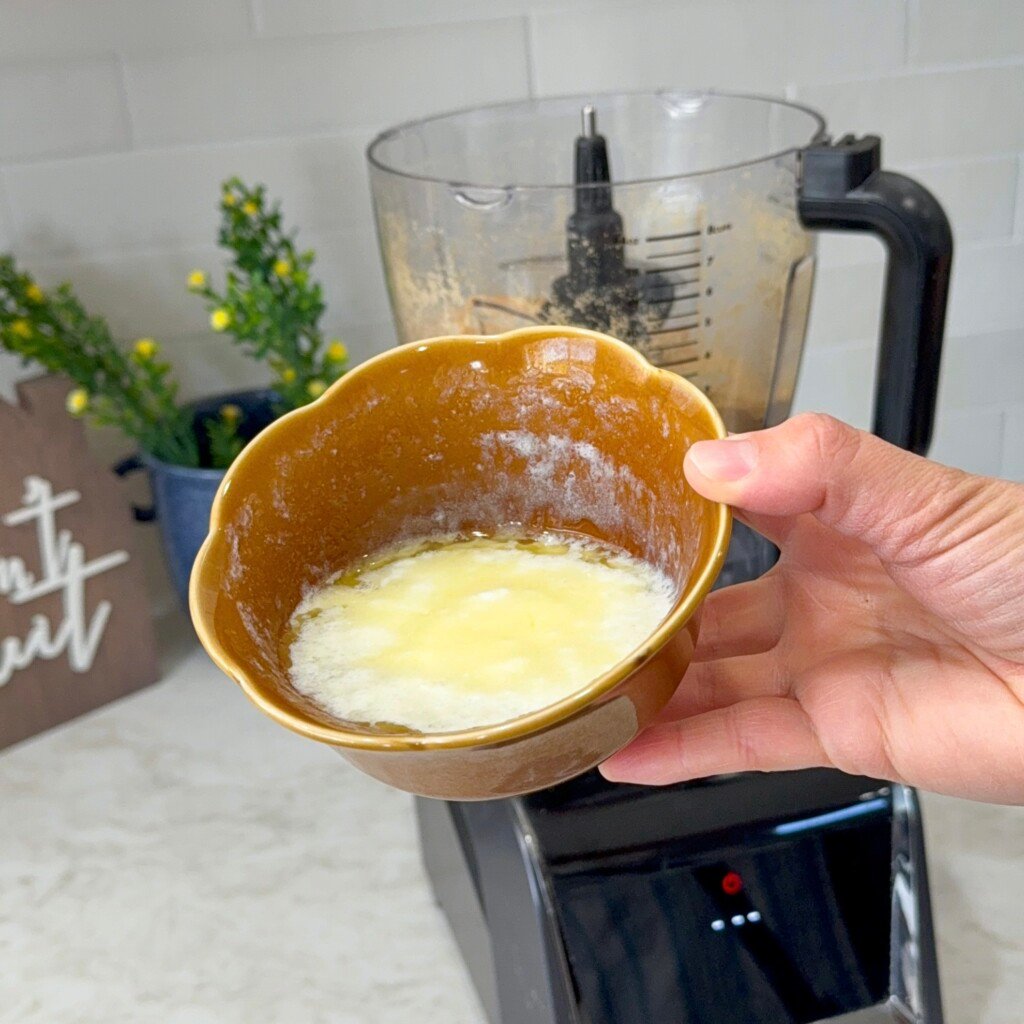
- Add the melted butter into the crushed graham crackers and mix to coat.
- Set 1/2 cup of the graham cracker crust to the side.
- Place the rest of the graham cracker crust into a 8×8 baking dish.
Make Cream Cheese Filling:
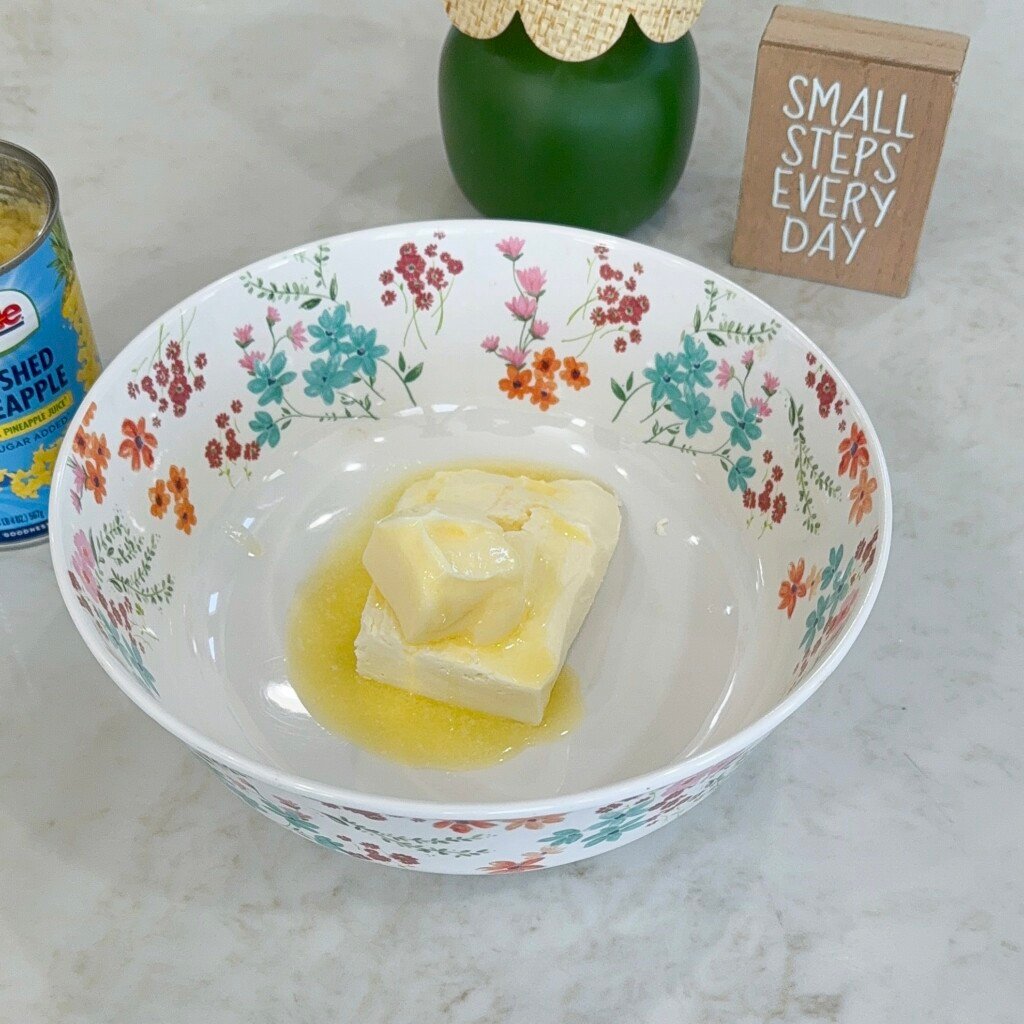
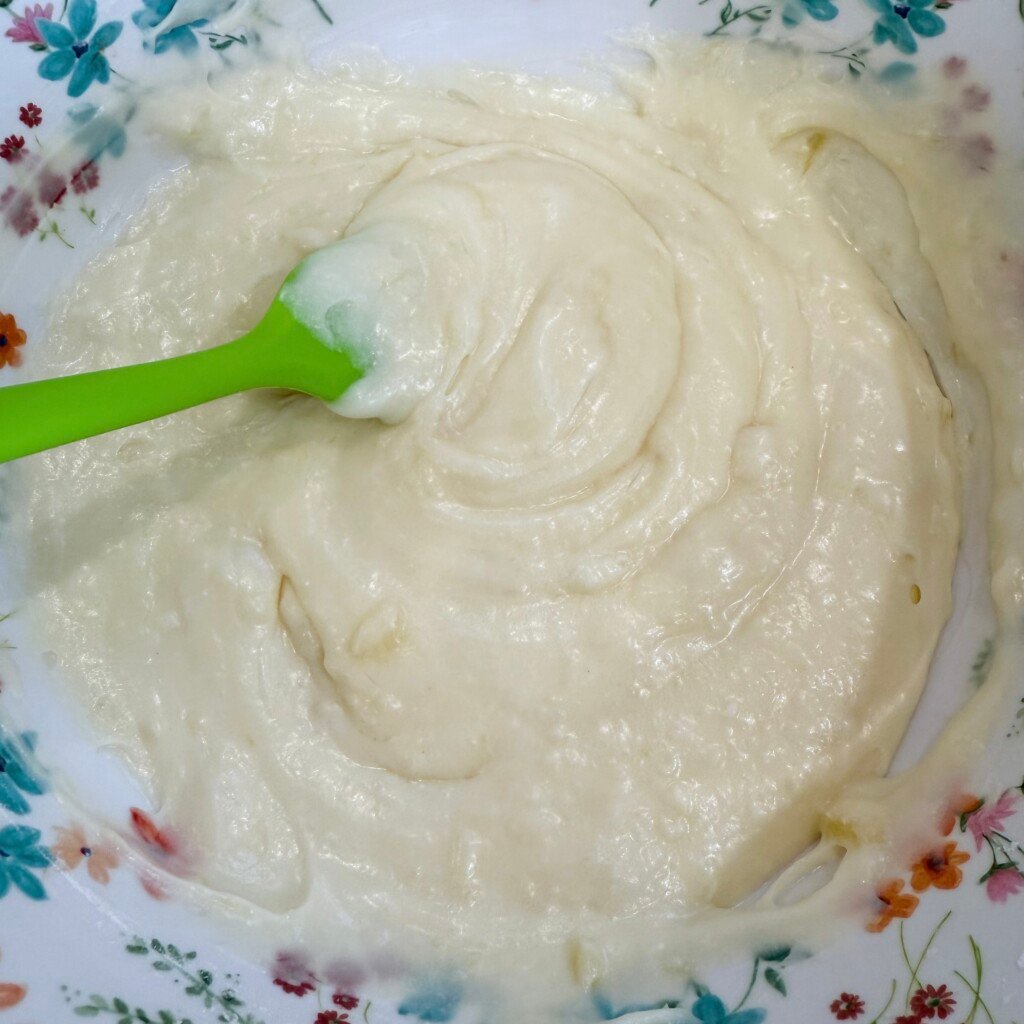
- In an electric mixer OR large mixing bowl mix the softened butter and softened cream cheese together.
- Now slowly stir in the powered sugar.
- Using a spatula stir in 2 tbs of the crushed pineapple.
Layer Cream Cheese:
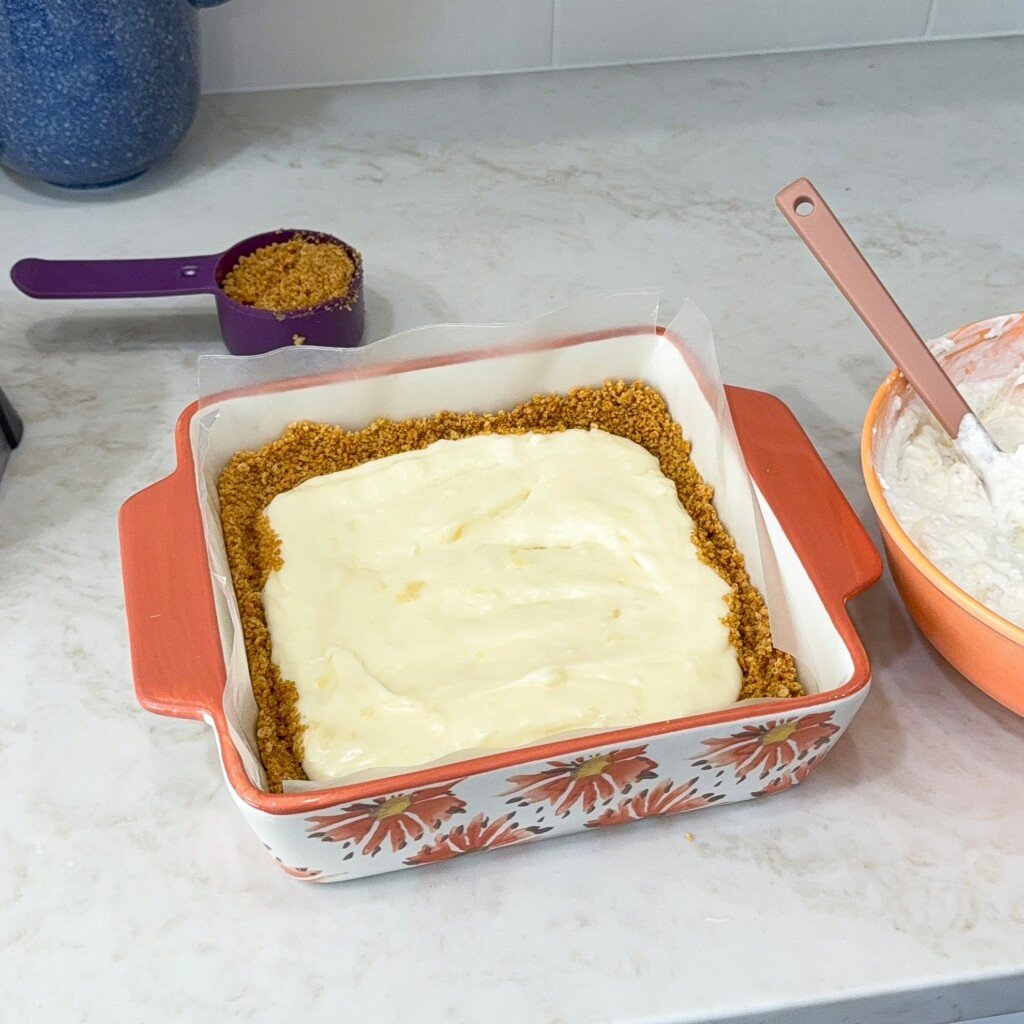
- Spread this cream cheese mixture over the graham cracker crust.
Make Pineapple Mixture:
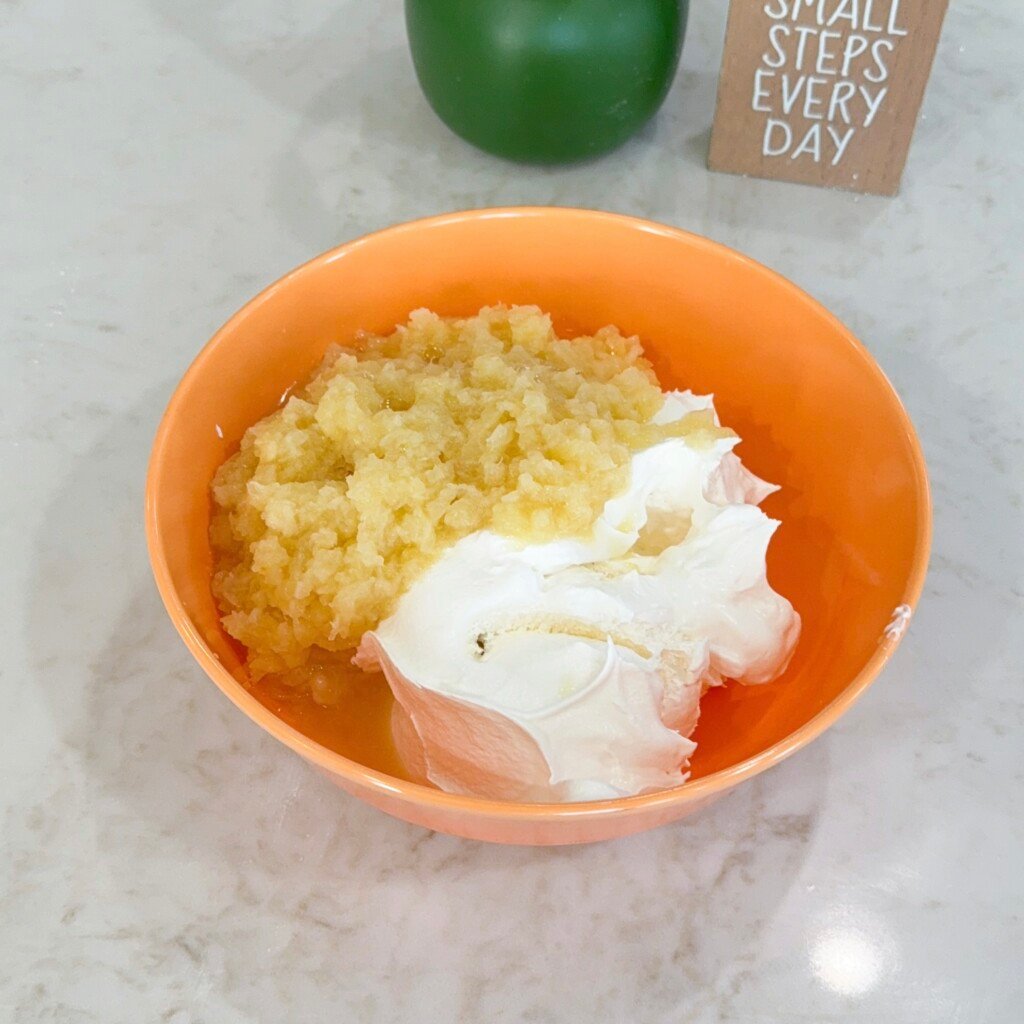
- To a medium-sized bowl add the remaining crushed pineapple and cool whip fold these ingredients together.
Add Next Layers:
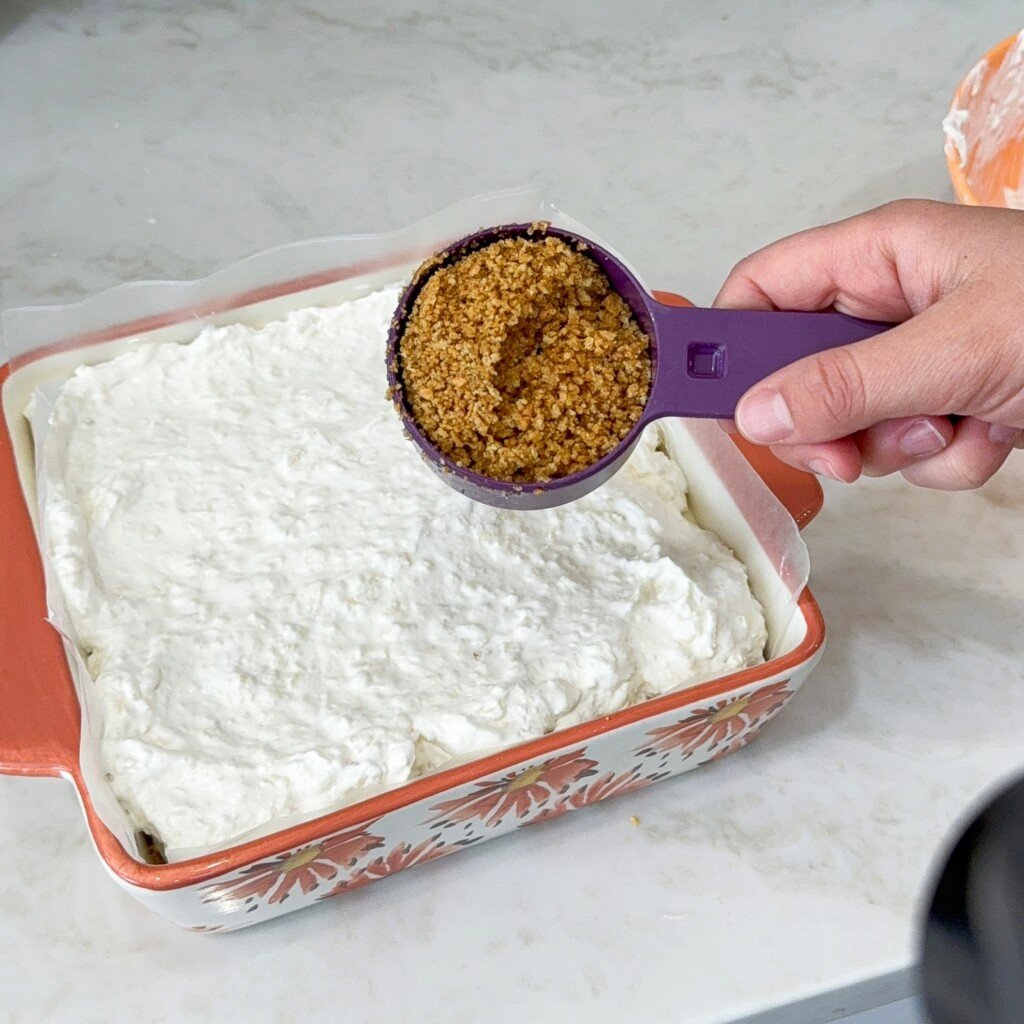
- Spread over the cream cheese layer.
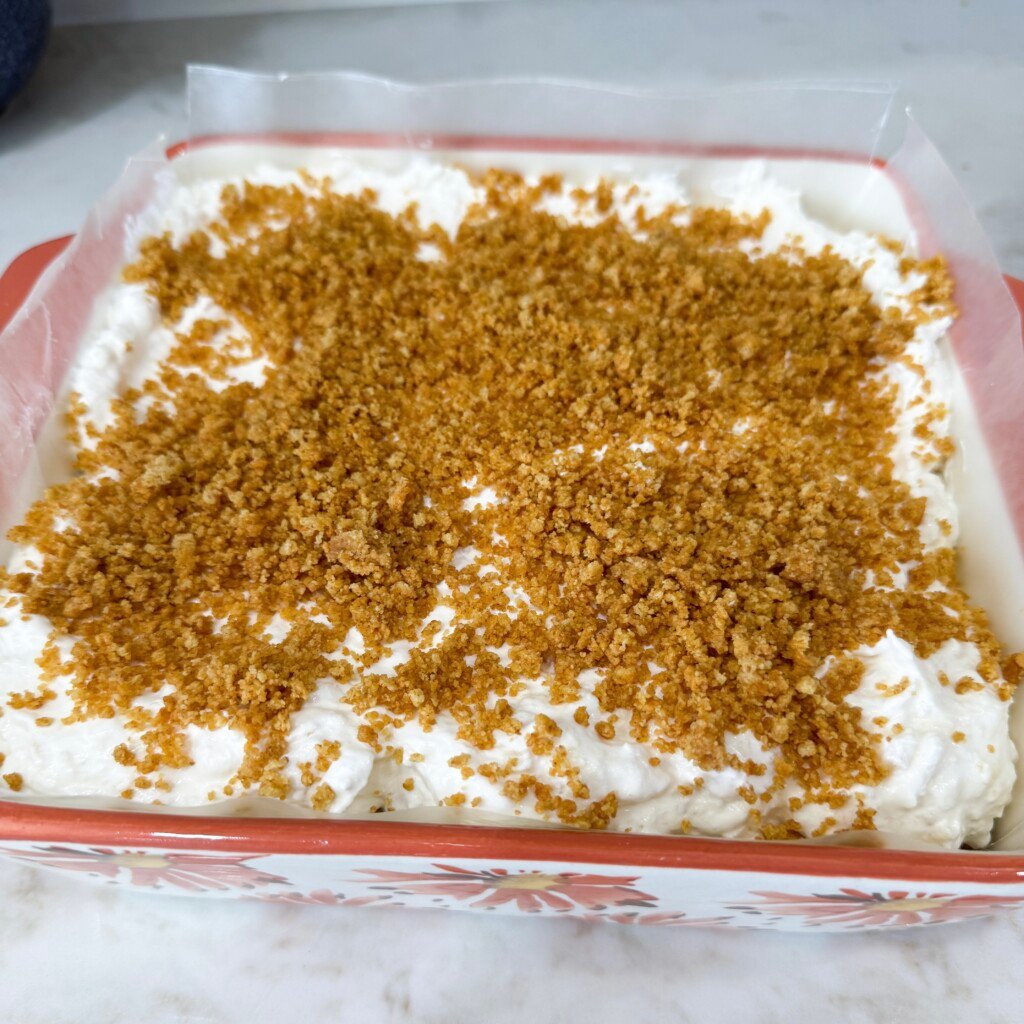
- Sprinkle the top with the reserved 1/2 cup of graham cracker crust.
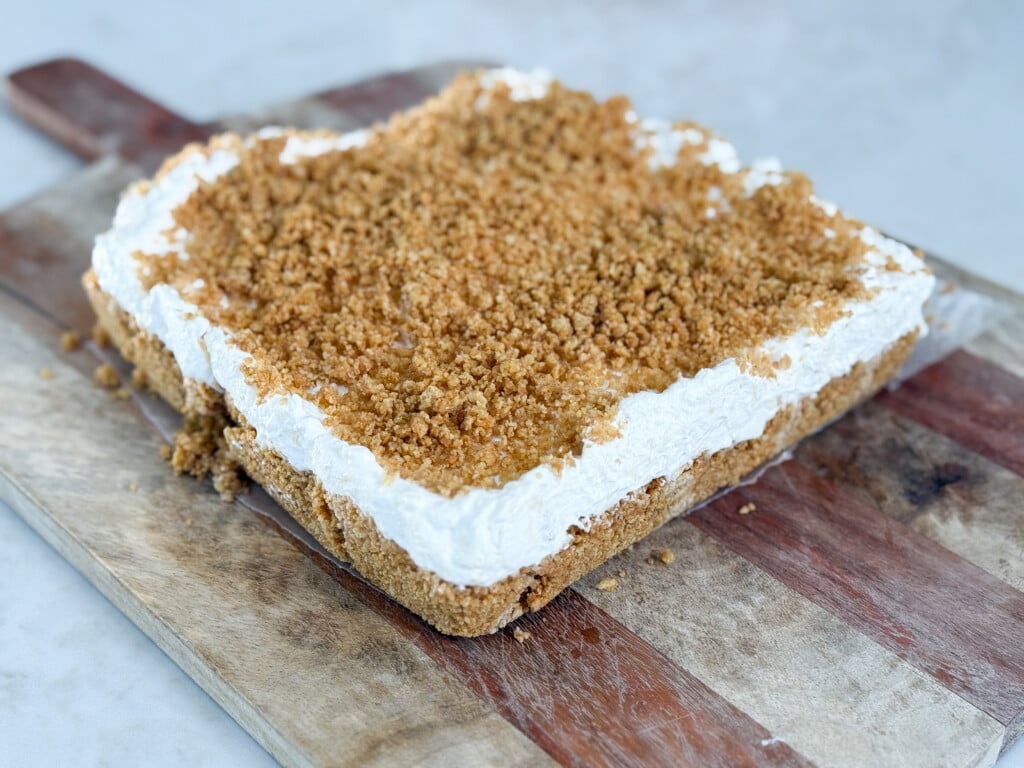
- Cover no bake pineapple bars and refrigerate for at least 5 hours. Enjoy!
No-Bake Pineapple Layered Dessert
Equipment
- 8×8 baking dish
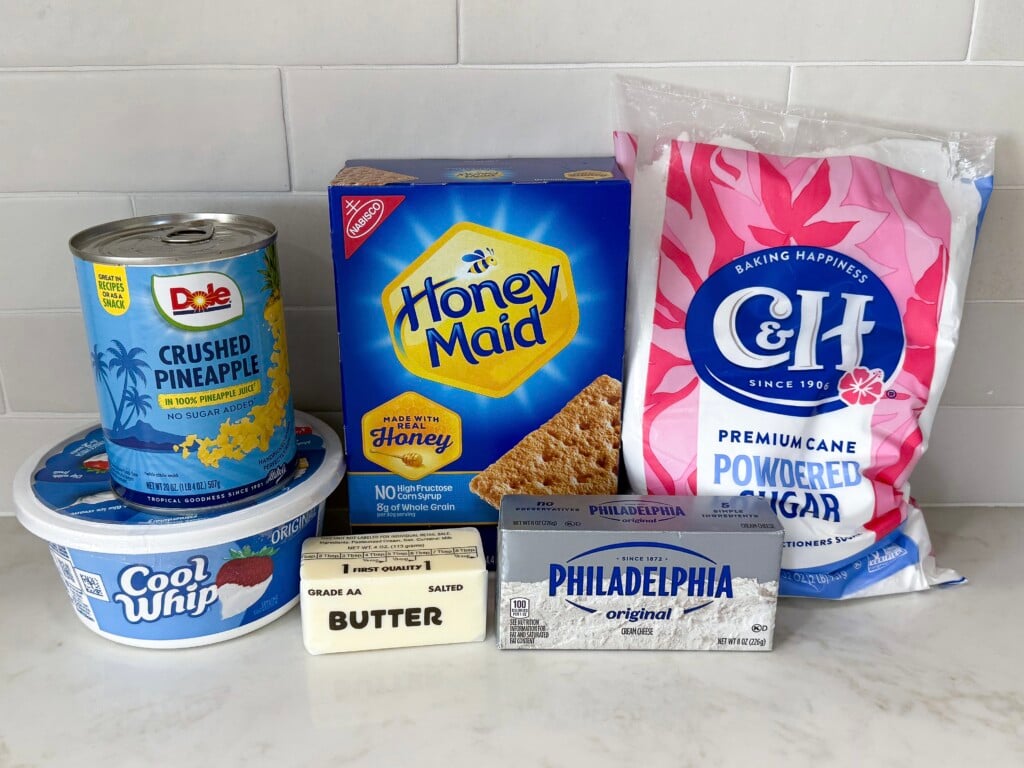
Ingredients
Graham Cracker Crust:
- 1 ½ sleeves of graham crackers
- ½ cup butter, melted
Cream Cheese Filling:
- 6 oz cream cheese, softened
- ¼ cup butter, softened
- 2 cups powered sugar
Cool Whip Topping:
- 20 oz crushed pineapple, drained well
- 8 oz cool whip
Instructions
Create the Crust:
- Place the graham crackers into a large ziplock bag and crush then with a rolling pin to crush the graham crackers (or you can place the graham crackers into a food processor to crush).
- Add the melted butter into the crushed graham crackers and mix to coat.
- Set 1/2 cup of the graham cracker crust to the side.
- Place the rest of the graham cracker crust into a 8×8 baking dish.
Make Cream Cheese Filling:
- In an electric mixer OR large mixing bowl mix the softened butter and softened cream cheese together.
- Now slowly stir in the powered sugar.
- Using a spatula stir in 2 tbs of the crushed pineapple.
Layer Cream Cheese:
- Spread this cream cheese mixture over the graham cracker crust.
Make Pineapple Mixture:
- To a medium-sized bowl add the remaining crushed pineapple and cool whip fold these ingredients together.
Add Next Layers:
- Spread over the cream cheese layer.
- Sprinkle the top with the reserved 1/2 cup of graham cracker crust.
- Cover no bake pineapple bars and refrigerate for at least 5 hours. Enjoy!
Nutrition
Nutrition information is automatically calculated, so should only be used as an approximation.
How to store the no bake pineapple dessert:
Fridge: After getting all the layers of the pineapple dessert into the pan, store the baking dish covered with aluminum foil and store it in the fridge for up to 7 days.
Tips and tricks for making this lush pineapple dessert:
Crust to use for no bake pie with cream cheese filling:
If you choose to make your own graham cracker crust with graham cracker crumbs and melted butter in an 8×8 baking dish you are more than welcome to! However, I like to keep it simple with this no bake pineapple recipe and just get a store-bought pie.
More toppings for this easy no bake pineapple dessert:
- Toasted coconut
- Chopped white chocolate
- Chocolate sauce
- Fresh chopped pineapple
More dessert recipes:


Quick links for making dinner easy:
- Family meal plans
- Tools for the kitchen and more
- The best cookbook for family dinner recipes
- FREE budget meal plan
- Cooking videos to watch
If you give these recipes a try, make sure to tag us on Instagram @julia.pacheco.cooking and let us know how much you liked the recipes!

🤩 WOW!!! You won’t be disappointed if you like pineapple 🍍!
Julie! I made this today and it was so delicious!!! Thanks for sharing these recipes with us. I’m planning to make the chocolate pie for memorial day.
We’re still enjoying this dessert – the crumb base and top crumbs all stay nicely crisp when leftovers are stored in fridge, covered with plastic wrap. When I make this again, I might experiment with making it more like a “bar” with thinner layers – the same amount of pineapple but half the cream cheese filling and also half the Cool Whip.
A good-looking layered dessert. If you’re like me and store the Cool Whip in the freezer, take that out the night before to thaw in the fridge, and get your butter & cream cheese out to countertop at least an hour before you want to make this. My total prep time (including getting out ingredients and equipment thru placing items in dishwasher) was almost an hour. Melting the butter, crushing the crackers, draining the pineapple were all longer prep steps — I doubt that even with practice I’ll ever get this made in 10 minutes.